Migratie assistent van windows naar mac
Step 5: Launch Migration Assistant on your Mac. On Mac, the Migration Utility is a built-in tool and can be found under Utilities folder. Step 6: Follow on-screen directions on your Mac, choose what you want to transfer to transfer all required data from your Windows 10 PC to your new Mac.
There are tens of third-party software out there to help you transfer data between Mac and PC over Wi-Fi. This folder is hidden by default in macOS. Once the folder is visible, you can continue:.
Question Info
You might see files that seem similar, such as com. The only file you need to copy is com. That's it. With all the necessary files copied to the new Mac or system, you should be able to launch Apple Mail and have all of your emails in place, your Mail rules functioning, and all Mail accounts working. If something can go wrong, it usually will, and moving Keychains around can cause a problem. Fortunately, it's easy to correct. This can happen if you have already used your new Mac or system, and in the process, it created its own Keychain files. If you're using OS X Mavericks or earlier, you can use the following steps to work around the problem:.
If you're using OS X Yosemite or later, you can use an alternative method of getting your new Mac or system to use your existing Keychain files.
Mac OS X - How to use Migration Assistant to transfer files from another Mac
Instead of copying the files, you can make use of iCloud and its ability to sync Keychains between multiple Macs and iOS devices to achieve the same results. Occasionally, you may run into a problem when you first launch Apple Mail on your new Mac or system. The error message will usually tell you that Mail doesn't have permission to access a file. Your username should be listed as having read and write access. You might find that, because the account IDs between your old Mac and the new system are different, instead of seeing your username listed, you see unknown.
That should correct the problem. If Apple Mail reports a similar error with another file, try adding your username to every file in the Mail folder using the Propagate command. You can also try resetting user permissions if all else fails. Share Pin Email. Tom Nelson has written hundreds of articles, tutorials, and reviews for Other World Computing and About. He is the president of Coyote Moon, Inc. Updated November 26, You'll need a few tools to perform the process of transferring your emails from Apple Mail: A way to transfer files to the new location.
Apple - Support - Downloads
You can transfer your files over a network, burn them to a CD or DVD, copy them to a USB flash drive , or, if the new system is on the same Mac, copy them from one partition to another. Administrative access to your data. You might need to change the file privileges; however, this step is probably unnecessary for most people. It gives you multiple ways to deal with the problem, all without having to stop and perform some sort of workaround.
Data migration can be performed between two computers connected via a wired or wireless Ethernet network. You can also migrate data using a FireWire network or a Thunderbolt network. In these types of networks, you connect two Macs using either a FireWire cable or a Thunderbolt cable. Migration can also be performed from any startup drive that can be mounted on the destination Mac. For instance, if you have an older Mac that has had hardware problems, you could install its old startup drive in an external enclosure and connect the enclosure to your new Mac via USB or Thunderbolt.
User data can also be moved from a PC to a new Mac via a network connection. Migration Assistant can't copy PC applications, but your user data, such as documents, pictures, and movies, can all be migrated from a PC to your new Mac. Migration Assistant can transfer any user account type from the source Mac to the destination Mac.
It can also transfer applications, user data, other files and folders, and computer and network settings.
Browse Downloads by Product
This guide will show you, in detail, the steps to move your user account data from an older Mac to a new Mac connected via your home or office network. This same method, with just slight changes to button and menu names, can also be used to copy an account from a startup drive connected directly to the new Mac, or from Macs connected via FireWire or Thunderbolt cable. Using the Migration Assistant app that comes with OS X is relatively painless; the version included with OS X Yosemite contains a few improvements over previous versions to make the process even easier.
In this guide, we're going to use the Migration Assistant to copy our user and application data from an older Mac to a Mac we just recently purchased. This is the most likely reason to use the Migration Assistant, but there are other reasons to use it, including copying your user data to a clean install of OS X. The major difference between the two uses of the Migration Assistant is the source of the data.
How to Move Your Apple Mail to a New Mac
In the first case, you're likely copying files from an older Mac that's connected to your home or office network. In the second, you're probably copying files from a startup drive connected to your current Mac. Otherwise, the two methods are pretty much the same. Go on to Page Three for information on how to use the list of items that can be transferred, and to complete the transfer process.
- A Guide to the OS X Yosemite Migration Assistant.
- Download - Windows-migratie-assistent v?
- Apple Footer!
- how is league of legends on mac;
- Transfer Your Apple Mail to a New Mac?
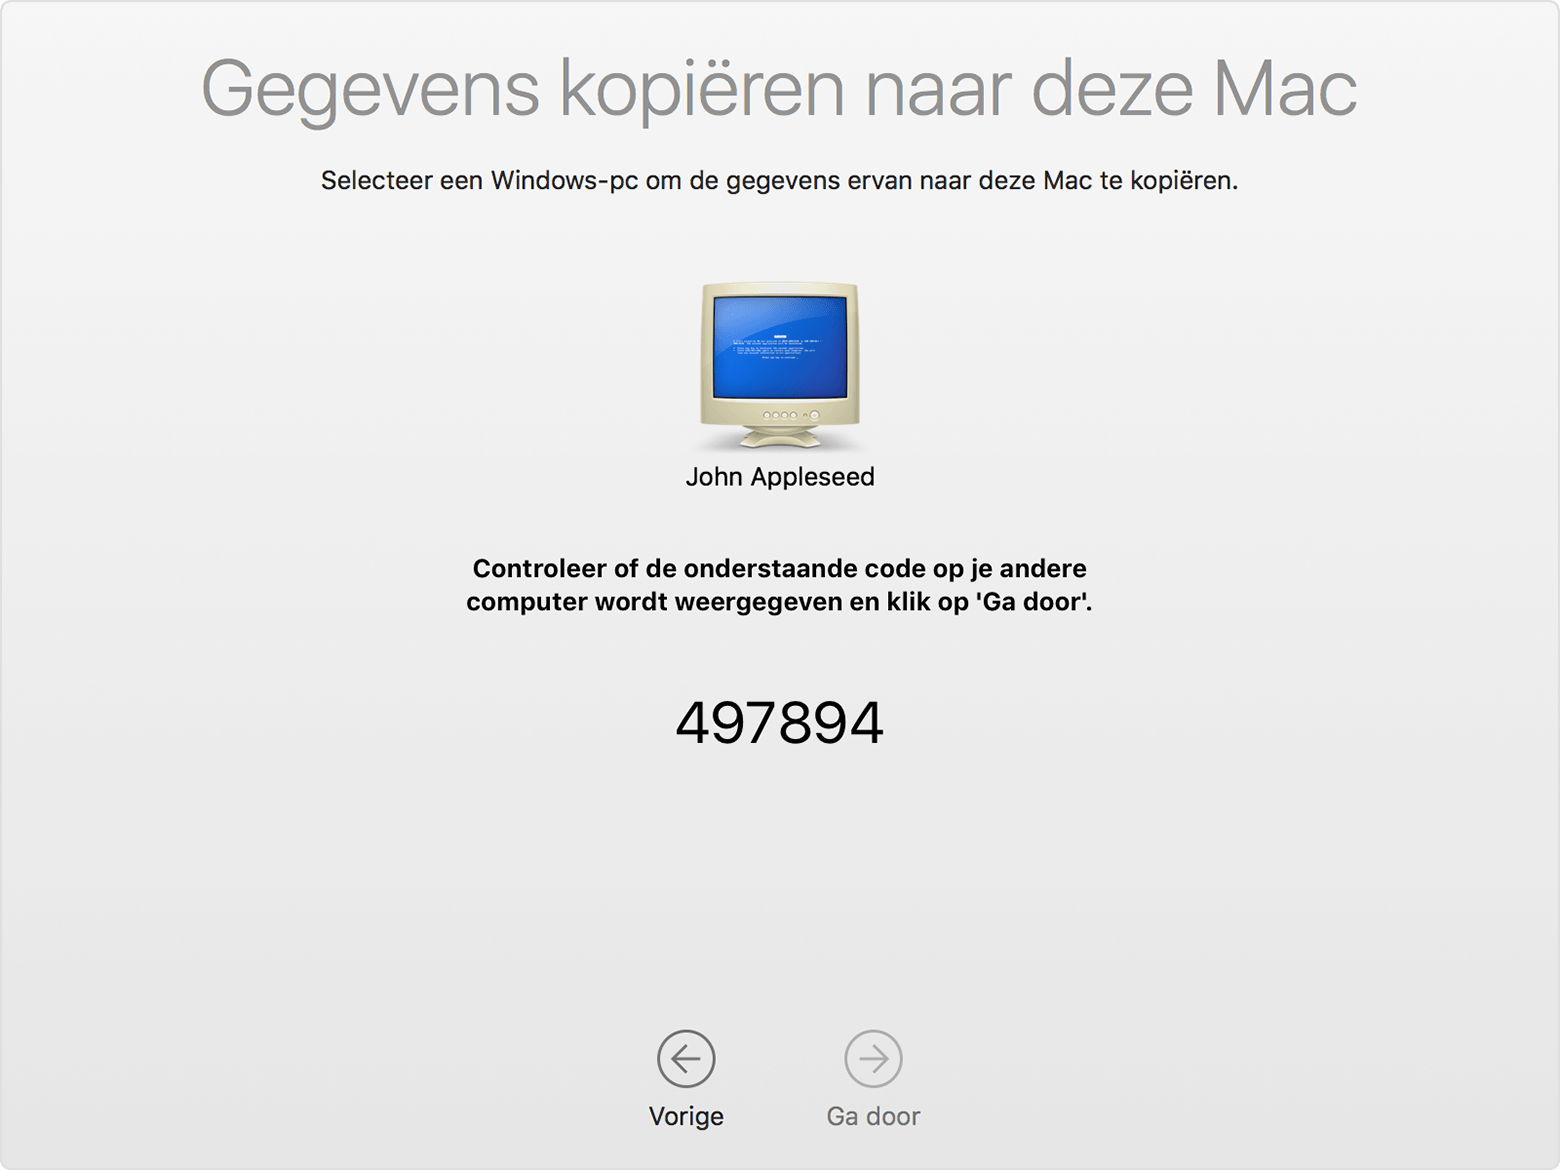
In the previous steps, you launched Migration Assistant on both your old and new Macs and set up the assistant to transfer files from the old Mac to the new Mac. You verified that the two Macs are in communication by matching a code number generated by the Migration Assistant app, and you're now waiting while your new Mac begins gathering information from your old Mac about the type of data that can transfer between them. This process can take a bit of time, so be patient.
Eventually, your new Mac will display a list of items that can be migrated to it. All applications installed in the Applications folder on your old Mac can be transferred over to your new Mac. If an application exists on both the old and new Macs, the newest version will be retained. You can only bring over all applications or none; you can't pick and choose apps. User Accounts: This is likely the main reason you wanted to bring data from your old Mac to your new Mac. All of your documents, music, movies, and pictures are stored in your user account. The Migration Assistant allows you to copy or ignore each of the following user account folders:.
The other data item is essentially any files or folders you created within your user account, but are not within any of the special folders named above. Other Files and Folders: Files and folders refer to items that reside at the top level of the old Mac's startup drive.
Selecting this option will ensure that any non-Mac apps you may have installed are also brought over to your new Mac. Computers and Network Settings: This allows Migration Assistant to bring settings information from your old Mac to your new Mac. This includes such things as your Mac's name, and network setup and preferences. Migration Assistant can now resolve user account duplication problems that have been an issue in the past. With previous versions of Migration Assistant, you couldn't copy a user account to your new Mac if that user account name was already present on the new Mac.