Mac os system performance monitor
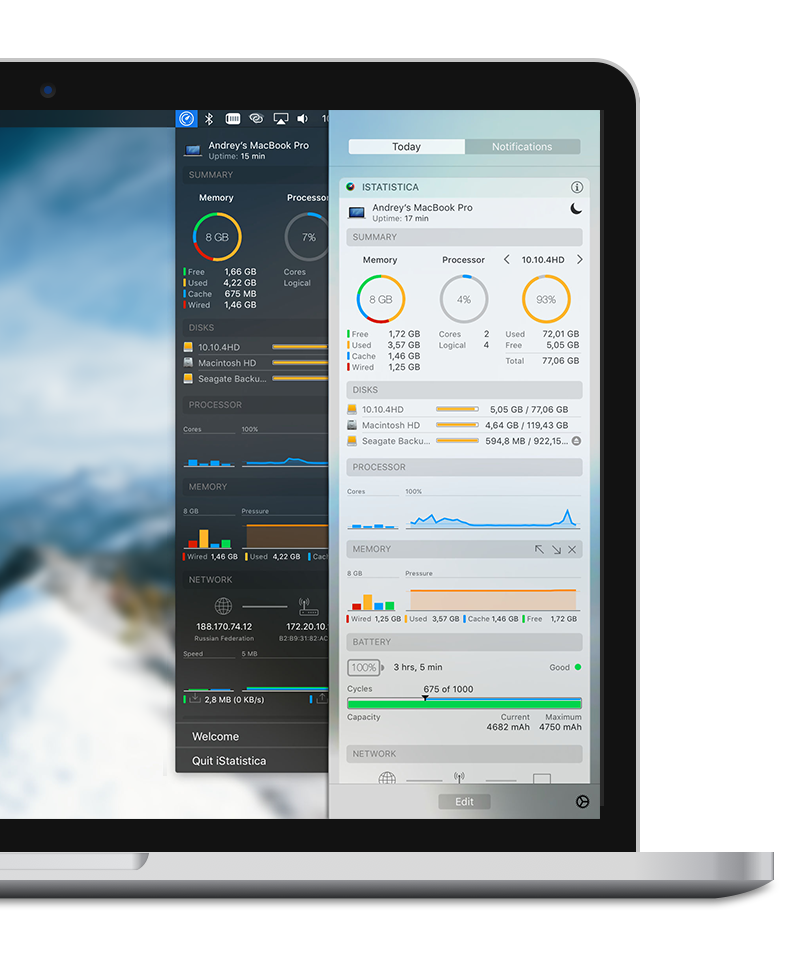
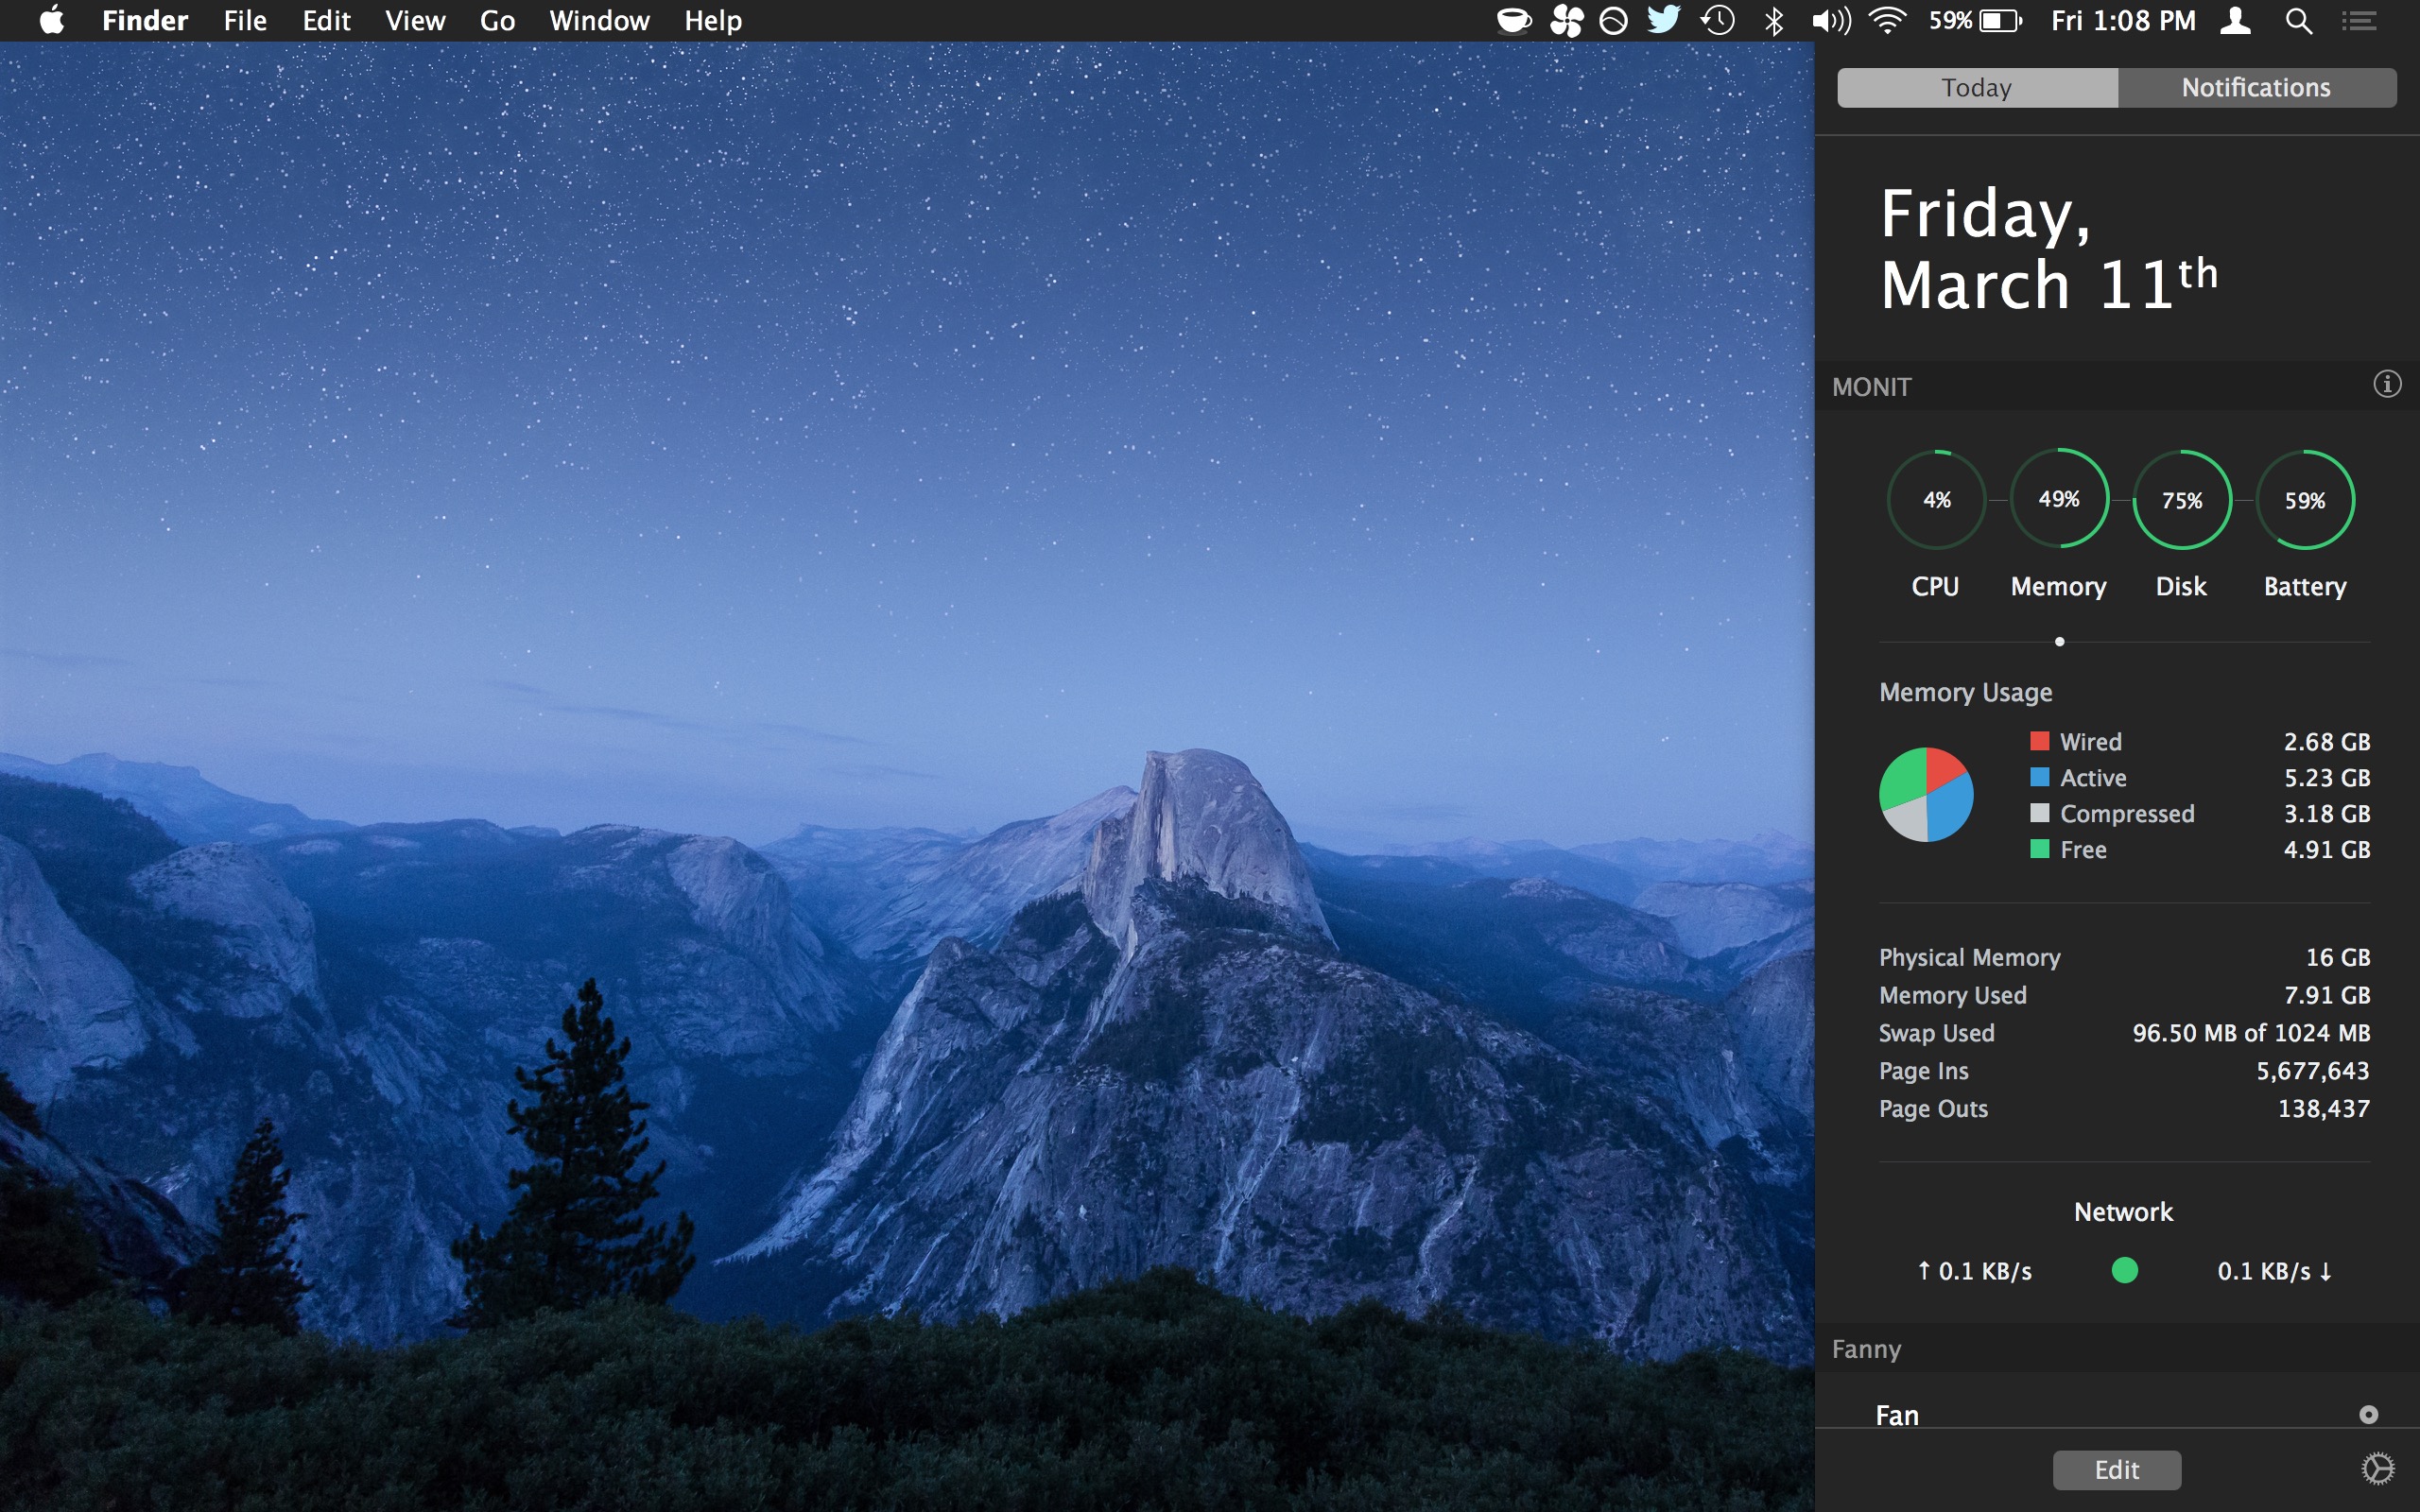
Green means memory resources are available, and red means your Mac has run out of memory and is resorting to your hard drive which is much slower.
4 hidden Mac tweaks to speed up your computer
It could just mean that your Mac has a lot of cached files that are available for other apps if they need it. There are only two ways to fix this: The Energy pane is extremely useful for laptop owners. Click the triangle next to the app name to display all child processes under the parent application. Be careful, though: So always save your work before you force quit something.
Having enough RAM is crucial for system stability, but your hard drive is almost important. If your hard drive is running out of space, it can get even worse: In the event a disk intensive application is running, which may be a system process or a user added application, such as a database, the activity will vary along with the activity of the offending process. The Network pane shows how much data your Mac is sending or receiving over your network and the internet.
The information at the bottom shows network usage in packets and amount of data. You can switch the graph to show either, though data is probably the more useful of the two.
- pasar contactos de blackberry a android mac.
- How to See CPU Utilization on a MacBook Pro;
- HP Spells P-R-I-N-T.
- How To Monitor Your macOS System;
- System Monitor: Tom's Mac Software Pick;
Blue shows data received, and red shows data sent. Every application that you use on your Mac sends or receives something, be it your email, RSS reader, and more. Most of these apps are ones you trust. It shows total network activity across all apps, and processes that are sending or receiving the most data. It helps you gain insight into many hidden but invaluable facets of your computer—from CPU and RAM usage to disk usage. The Best Tech Newsletter Anywhere. Join , subscribers and get a daily digest of news, comics, trivia, reviews, and more. If you want to make sure your machine runs as lean and as mean as possible, you can turn these extra visual flourishes off.
This trick is especially useful for those who tend to leave a lot of applications and windows open at one time. To cut down on the extraneous eye candy, open up System Preferences from the Apple menu, then go to Accessibility and open up the Display tab. Tick the boxes marked Reduce motion and Reduce transparency, which will leave you with a faster, albeit plainer, interface. While you have System Preferences open, you can adjust more visual settings.
1. Tone down the visual effects
Go to the Dock screen to switch off the animation for opening applications. For another tiny speed boost, use this menu to lock the Dock in place at the bottom of the screen rather than having it constantly disappear and reappear. In the General tab, you also set the menu bar to stay in place and not pop in and out. Beyond System Preferences, you can adjust visuals with an application called TinkerTool.
Free to download and use, it gives you access to a few extra settings that the built-in app doesn't cover. For example, you can disable animation effects in Finder, and the fade-in and fade-out images in Launchpad.
For more options, click through the various panes of TinkerTool and try turning some effects on and off. When your computer is crawling along, you need to figure out just what might be slowing it down. To find out where all your system resources are going, check out a very useful program called Activity Monitor. Hidden away within the Applications menu, this utility launches from Spotlight. Then type "Activity Monitor" into the box. Select the first suggestion that comes up in the list, and it will show you all of the applications and background processes currently running on your Mac.
Within Activity Monitor, you'll see a barrage of constantly updating numbers and app names, but don't panic.
The Best System Monitor for Mac OS X
These screens are actually pretty simple to navigate. The first tab, CPU, shows how much processing power the running programs require. CPU stands for Central Processing Unit; this component acts as the brains of the computer and performs most of its calculations.
- System Monitor: Tom's Mac Software Pick.
- Current Version;
- dragon naturally speaking mac microphone.
You'll see all of the open programs in the column on the left, along with the percentage of processor time they're currently taking up. The bottom of this tab shows you the overall CPU usage with a constantly-updating graph. If it's somewhere near the maximum amount of RAM installed on your machine, that might explain any system slowdowns or crashes you've been experiencing.
Within Activity Monitor, you may encounter unfamiliar programs or processes. Click the little "i" button for more information about what that application does. To stop it in its tracks, click the little "x" button—just be sure you know what the process does first. Once you're comfortable navigating within Activity Monitor, you can use this knowledge to improve your system's performance. First, identify the applications that are consuming up more than their fair share of resources.
If they don't really need to be open, you can shut them down. If you'd like to keep running one of the programs in question, open up its settings to see if you can get it to work more efficiently. For example, in a browser application, you might try disabling any extensions. Your macOS machine relies on having a decent chunk of free hard disk space where it can store temporary files. It also needs this room because, if it runs out of RAM, it will store information on the hard drive.
Without that space, when your laptop or desktop starts to run low on hard drive room, then you're probably going to notice an overall sluggishness in system performance. Thankfully, macOS has some options to help you out. Open up the Apple menu, choose About this Mac, and switch to the Storage tab to see which types of files are using up your disk space. To tidy them and free up some extra room, click on the Manage button.
Apple first introduced the Manage ability for macOS Sierra in September , so if you use an older version of the operating system, these instructions may not apply.