/HD-SSD-56a5d46d3df78cf7728a0cc0.jpg)
Diy fusion drive mac mini
On my demo server that I use rarely, and even then mostly with Apple Remote Desktop I noticed that it felt much slower than it used to be. Since You need to redo this step after re-installing the OS, and check after upgrade the OS. In-depth and DeployStudio can do that! Local DeployStudio setup for classes: The setup of an iPad can be a piece of cake. Posted on: To solve, I had to: All worked well this time!
How to create a Fusion Drive in OS X:
Got all the way to the last step when terminal said that the uuid was not a real uuid. Re entered but no dice. Not in disk utility or the system profile.
- home and business 2013 mac;
- media player for mac os.
- Back up your data.
How can I get it to mount again? Thank you for this. I followed these instructions in terminal and confirmed via Disk Util and it appeared that creating the Fusion drive worked.
However, after booting from a CCC carbon copy cloner the new fusion drive did not appear on the desktop. I checked in Disk Util and the fusion drive was red and I could not do anything with it.
Creating a DIY Fusion Drive
No SSD. No unique UUID. Thanks for the great tutorial. It would be great if there was an application with GUI to do it all with a simple click. You know, the Mac way. But even better would be to have cheap SSD. Steve Sande Feeling the need for speed? Take a look at the MacSales. OWC Data Doubler. OWC Multi-Mount. The DiskUtil command at work. Be Sociable, Share this! Once the process is complete, they will become a single volume named Fusion. By the way, the "s" in the disk name indicates it's a drive that has been partitioned; the number after the s is the partition number.
- adobe pdf filler for mac;
- Before you begin!
- Use Terminal to create a Fusion Drive again;
- jaksta streaming media recorder for mac.
Even when you format a drive on your Mac, you're going to see at least two partitions when you view the drive using Terminal and diskutil. We can just ignore the EFI partition here. Now that we know the disk names, it's time to create the logical volume group, which we will do on page 4 of this guide. The next step is to use the disk names we looked up on page 2 of this guide to assign the drives to a logical volume group that core storage can use.
With the disk names at hand, we're ready to perform the first step in creating a Fusion drive, which is creating the logical volume group. Once again, we will use Terminal to execute the special core storage commands. The process of creating the logical volume group will erase all data on the two drives. Be sure to have a current backup of the data on both drives before you begin. Also, pay special attention to the device names you use.
This name won't show up on your Mac as the volume name for the finished Fusion drive. You can use any name you like; I suggest using lowercase letters or numbers, with no spaces or special characters.
Device1 and device2 are the disk names that you wrote down earlier. Device1 must be the faster of the two devices.
DIY Fusion drive
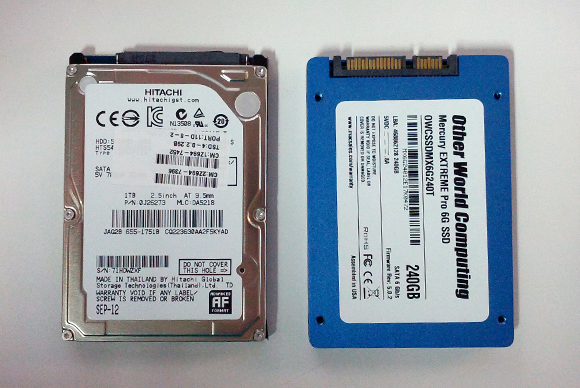
In our example, device1 is the SSD and device2 are the platter-based drive. Core storage doesn't do any type of checking to see which is the faster device; it uses the order you place the drives in when you create the logical volume group to determine which drive is the primary faster drive. Enter the above command in Terminal, but be sure to use your own lvgName and your own disk names. Terminal will provide information about the process of converting your two drives to members of a core storage logical volume group.
The UUID is used in the next core storage command, which creates the actual Fusion volume, so be sure to write it down. Here is an example of the Terminal output:. Notice the UUID that was generated: That's quite an identifier, definitely unique and definitely not brief and memorable. Be sure to write it down, because we will be using it in the next step. So far, we discovered the disk names we need to start creating the Fusion drive.
We then used the names to create a logical volume group. Now we're ready to make that logical volume group into a Fusion volume that the OS can use.
Have a DIY Fusion Drive? Don’t forget ‘trimforce enable’ ! - LAI
Now that we have a core storage logical volume group made up of two drives, we can create the actual Fusion volume for your Mac. The format of the command is:. The easiest way to enter this rather cumbersome number is to scroll back in the Terminal window and copy the UUID to your clipboard. The type refers to the format type to use.